
 Latest images
Mon Jul 08, 2013 3:56 pm by Admin
For the benefit of 944Hybrids users there are two search functions available for you to use.
The purpose of this sticky is to explain the "Advanced Search" function because it is much more powerful and is the best choice when researching information.
When you log on to the site a list of options is shown in a line at the top of the page. One option is labelled "Search", use this option (NOT the search box lower down on the right).
After you click on the upper search option, a drop down box appears. At the bottom of this box is a radio button marked "Advanced …
Comments: 0
My Gen 5 LT1 Build
Page 1 of 2 • 1, 2 ![]()

My Gen 5 LT1 Build
![]() Babineaux Mon May 11, 2020 5:35 pm
Babineaux Mon May 11, 2020 5:35 pm
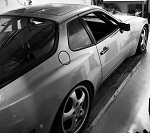
I recently I purchased a running and driving 88' 944S that was a barn find for $500 or so. Pulled from a barn on horse ranch. The body and everything is in really good condition but the interior was shot because the previous owner left the windows down and... yeah.. nasty and rusty interior around barn animals and trees. I originally purchased the vehicle for the engine and to be essentially a parts car for my other 944 (1987 944S) should I ever need anything. The car was originally black, but somewhere along it's lifespan someone painted it silver.
[You must be registered and logged in to see this image.]
A few months after that I ended up getting an amazing price on a 6.2L Gen 5 L86 (Same engine as LT1, just with different intake manifold for more torque.) So my plans changed for the new car. Still plan on keeping the engine for my other 944, but now gutting out the barn find and trying to decide how far I take it on the race car spectrum (read: how much money to sink into it Laughing ) The engine is a crate engine from my work and was used in a test mule, so it basically has break-in mileage. Seeing as it was used in a boat, there were certain things that needed to be done to convert it back to automotive use.
[You must be registered and logged in to see this image.]
I searched and searched but couldn't find anyone who had done this swap, or is currently doing this swap. It looks like there's a few others on here who are doing the same, but I think i'm further along in the process. Given that there's no info online, there was a lot of research on my end and working with various companies to figure out parts. I've gotten most things pieced together now and i'm currently in the process of pulling the Porsche engine.
I won't really know if things pieced together will work or not until I test fit the LT. Once it's in, there will be a lot more to figure out i'm sure.
Hopefully my journey can help anyone else who will be tackling the LTx swap.
Last edited by Babineaux on Mon May 11, 2020 7:14 pm; edited 1 time in total
Babineaux- Posts : 20
Join date : 2020-04-23
Re: My Gen 5 LT1 Build
![]() Babineaux Mon May 11, 2020 5:38 pm
Babineaux Mon May 11, 2020 5:38 pm
[You must be registered and logged in to see this image.]
Babineaux- Posts : 20
Join date : 2020-04-23
Re: My Gen 5 LT1 Build
![]() Babineaux Mon May 11, 2020 5:40 pm
Babineaux Mon May 11, 2020 5:40 pm
[You must be registered and logged in to see this image.]
Babineaux- Posts : 20
Join date : 2020-04-23
Re: My Gen 5 LT1 Build
![]() ramone Mon May 11, 2020 6:07 pm
ramone Mon May 11, 2020 6:07 pm
ramone- Posts : 3
Join date : 2019-09-16
Re: My Gen 5 LT1 Build
![]() Babineaux Mon May 11, 2020 7:04 pm
Babineaux Mon May 11, 2020 7:04 pm
[You must be registered and logged in to see this image.]
The bell housing doesn't mate up to the torque tube. Just measured it and it's 0.925" (rounding to 1" inch to make it easier) short of mating together.
[You must be registered and logged in to see this image.]
The bellhousing i'm using is the Quick Time RM-6033. It appears the problem may lie either with the depth of the bellhousing (not sure if the RM-6033 is the same depth as the OEM Gen 5) but I imagine the depth would be same and the bellhousing isn't my issue.
I'm thinking that perhaps the issue may be with the motor mounts. I'm using an ICT adapter plate that moves the LT engine mount to the LS location. And then using the LS engine mounts from TPC. I believe this combination is what's causing the issues with the engine sitting higher (the hood won't clearance) and the engine not being back far enough.
[You must be registered and logged in to see this image.]
** Please Note **
This fitment was done without the cross member spacers installed. So the engine will come down slightly. I think even with the spacers, hood clearance may be an issue. Perhaps this can be resolved with the motor mount location on the engine. Things I need to sort out.
[You must be registered and logged in to see this image.]
The cylinder head is about 1/2" away from the firewall. So if the engine needs to move back almost an inch, i may have to clearance the firewall (artistically rearrange with a mallet
[You must be registered and logged in to see this image.]
The journey continues in trying to figure everything out!
Babineaux- Posts : 20
Join date : 2020-04-23
Re: My Gen 5 LT1 Build
![]() Hotrodz of Dallas Tue May 12, 2020 5:57 pm
Hotrodz of Dallas Tue May 12, 2020 5:57 pm
Also, the intake on a LT1 is somewhat taller than the LS intakes, and they just barely clear with some hood brace modifications. You will more than likely have to use some type of hood scoop for clearance.

Hotrodz of Dallas- Posts : 615
Join date : 2015-10-31
Age : 65
Location : Dallas-Ft. Worth
Re: My Gen 5 LT1 Build
![]() Babineaux Tue May 12, 2020 8:25 pm
Babineaux Tue May 12, 2020 8:25 pm
Update:
I just pulled the engine mounts off and wanted to test if i could get the bellhousing and torque tube flange to mate up. And voila! I got them to mate. Was only able to get one bolt in as the engine was slightly twisted in the engine hoist. And as one person, I can't do both pushing the engine into being level and be under the car at the same time.
[You must be registered and logged in to see this image.]
There is about half an inch or so of clearance on the drivers side valve cover and the fire wall. I'm guessing this is the same as LS swaps. I've never seen one in person to compare though. Also, the clearance/encroachment of the brake booster area looks to have gotten a little better.
[You must be registered and logged in to see this image.]
This photo was without the cross member and the engine sat lower. With the cross member, the engine had to move back up. Overall it sits slightly lower than the photo in previous post, but still looks like it may be a problem for the brake booster area
[You must be registered and logged in to see this image.]
I was able to get the engine to sit down lower. But it will interfere with the cross member. I can notch the tabs for the steering rack and let the engine down a bit more. I DID use the cross member spacers from TPC this time
[You must be registered and logged in to see this image.]
Lowering the engine also allows better clearance for the front end accessories. The L86 water pump touched the hinge for the headlight on the drivers side. With the engine lower, everything clears. So if i can't lower the engine, it looks like i'll have to switch to the corvette or camaro water pump for clearance.
I think what may need to happen is new engine mounts. The LT mounting points are (from eyeing it) directly in line with the cross member. And I believe the engine mounts will determine how high or low the engine sits and if the tabs need to be trimmed on the cross member or not. And will also affect hood clearance. In the photos below, I tested both the drivers side and passengers side mounts to see if the angles could match up on the LT mount points. Part of the photos were cropped in upload, so only one of the LT mounts ends up in the photo on the second image.
[You must be registered and logged in to see this image.]
I think sorting the engine mounts may be where to focus. May take a bit of time to dial it in, but more to come!
Babineaux- Posts : 20
Join date : 2020-04-23
Re: My Gen 5 LT1 Build
![]() ramone Thu May 14, 2020 6:17 am
ramone Thu May 14, 2020 6:17 am
Do you think the hood clearance is going to be a problem?
ramone- Posts : 3
Join date : 2019-09-16
Re: My Gen 5 LT1 Build
![]() Babineaux Thu May 14, 2020 2:27 pm
Babineaux Thu May 14, 2020 2:27 pm
Not sure about hood clearance just yet as I don't have the engine in its final position. It will definitely be tight and to be honest... I don't want a cowled hood as I don't think it looks good on this car. It can look good on certain cars, but in my opinion it's too much IROC Z and mullet hair for my taste on the 944.
I'm currently working on making engine mounts. I will be 3D printing the engine plate and the base plate next week to help me figure out the angle and height of the post part of the mount. In the images below, the post section is just for visual reference as I have no clue if the angle and height is correct for this application. And it's a matter of finding good position for the engine and still having clearance for the cross member/ steering rack. So as you know, it's not just slapping on engine mounts, but finding proper fitment all around and not stressing steering or drive components.
Also, I don't know how the depth of the Quick Time bellhousing compares to the stock LT1 bellhousing that's adapted. So I can only take into account the Fore and Aft positioning of my specific engine and setup. I don't know if the stock Gen 5 bellhousing moves the engine further forward or back towards the firewall to be able to calculate the angle of the engine mounts.
These are the first mounts i'll be testing. As I dial in the angles and measurements, I may change the style up as well. Hoping in the next week or two I can get everything dialed in
[You must be registered and logged in to see this image.]
Babineaux- Posts : 20
Join date : 2020-04-23
Re: My Gen 5 LT1 Build
![]() Hotrodz of Dallas Thu May 14, 2020 3:02 pm
Hotrodz of Dallas Thu May 14, 2020 3:02 pm
And, trust me, a cowl induction hood only goes on late 60's, early 70's Camaro's. Mullet not required....
But your hood may require a hump added in to clear the intake and throttle body.
Hotrodz of Dallas- Posts : 615
Join date : 2015-10-31
Age : 65
Location : Dallas-Ft. Worth
Re: My Gen 5 LT1 Build
![]() Babineaux Sun May 24, 2020 4:09 pm
Babineaux Sun May 24, 2020 4:09 pm
Working out the drivers side (left hand drive) engine mount. Here's some images of the 3D prints for the mock-up before going to actual materials. Once everything is finalized, I'll verify everything with engineers at my work and will most likely use the same materials that we use in our boats to mount the engines. Currently the finalized "post" portion of the mount is being 3D printed. I'll be able to test fit later tonight. If all is good, i'll move on to the passenger side mount.
A few photos of the mock-up.
[You must be registered and logged in to see this image.]
Babineaux- Posts : 20
Join date : 2020-04-23
Re: My Gen 5 LT1 Build
![]() 4lo Wed May 27, 2020 6:24 am
4lo Wed May 27, 2020 6:24 am
Can see the LS vs LT length below.
[You must be registered and logged in to see this image.]
Love the build and doing something different. I had been looking at trying to run an LT4, but height was still the issue with hood clearance. How does your clearance look with the heads/headers and steering shaft?
4lo- Posts : 8
Join date : 2017-06-08
Re: My Gen 5 LT1 Build
![]() Babineaux Wed May 27, 2020 7:16 am
Babineaux Wed May 27, 2020 7:16 am
4lo wrote:The Gen5 LT engine itself is shorter length wise than the LS from my understanding by .5" which is probably why you are short to the bell housing.
How does your clearance look with the heads/headers and steering shaft?
Thank you for the visual information!
I have the bell housing mated to the torque tube now. The motor mount setup I had was an attempt to figure things out prior to testing in the car. They placed the engine too far forward. I've placed the engine in completely now with everything mated to the torque tube and i'm working out motor mounts. Just finished the drivers side mount and will be moving over to the passenger side this weekend.
As for Hood clearance, it's going to be tight. I don't have the hood on the car at the moment, so i'm not really able to test. Once I get a little further along, i'll be able to give better updates on hood clearance. Things will be a little slower going as I've been back to work and weekends are my only time to really work on the car.
Babineaux- Posts : 20
Join date : 2020-04-23
Re: My Gen 5 LT1 Build
![]() Midevil1981 Wed May 27, 2020 1:24 pm
Midevil1981 Wed May 27, 2020 1:24 pm
Midevil1981- Posts : 4
Join date : 2017-04-26
Re: My Gen 5 LT1 Build
![]() superman22x Tue Jul 07, 2020 6:41 am
superman22x Tue Jul 07, 2020 6:41 am
4lo wrote:The Gen5 LT engine itself is shorter length wise than the LS from my understanding by .5" which is probably why you are short to the bell housing.
I believe this length difference is only in the Corvette LT1, it has a shorter crank pulley, rather than AC on a separate belt, it's on the same belt as the other accessories. The Camaro LT1 and L86 have longer pulleys, by about 1/2".
On my LT1/997 swap I am doing, the intake actually works in my favor. I am able to close the hood with the popup spoiler without cutting like most LS swaps have needed for height clearance. The throttle body inlet is tilted down, which helps a lot. I may need to mount the throttle body at a 90* angle however, I'm not sure on that yet.
superman22x- Posts : 272
Join date : 2015-01-29
Re: My Gen 5 LT1 Build
![]() Babineaux Sat Feb 27, 2021 9:08 pm
Babineaux Sat Feb 27, 2021 9:08 pm
After a lot of CAD, 3D printing and test fitting, I have the final motor mounts fabricated and the engine is placed as low as possible. Everything on that turned out really well and all is nice and level. Also, the bell housing now mates up just fine to the torque tube. The previous issue was just trying to hodge-podge various brackets together looking for a quick and easy solution based on what limited things are available right now for LT swaps. Below are the fabricated final brackets. I need to get them Cerakoted, but that will come later once all the details have been figured out and the engine gets pulled so the car can be painted.
[You must be registered and logged in to see this image.]
I placed the engine as low as possible to help both with handling as well as hood clearance. I may need to switch to solid mounts to reduce any interference with the cross member under acceleration/motor flexing.
[You must be registered and logged in to see this image.]
These last few days I started to put the water pump and front end accessories on to the engine. The water pump that I have is the truck version off the L86. This pump doesn't work due to the location of the water neck. It hits the drivers side (US vehicle) headlight hinge. There is literally no way to put a radiator hose on that unless you chose to run the GT style headlights and removed the entire flip-up headlight brackets. I'm wanting to keep the pop-up headlights, so I started looking at the Corvette and Camaro water pumps. I opted for the Corvette pump due to the location of the inlet and outlet. I also don't think the Camaro pump will work due to the inlet neck sticking far out on the passenger/battery side of the vehicle. I believe the inlet neck will crash/interfere with the frame rail. On the plus side... the heater hose outlets on the truck pump are in a good spot. The negative aspects to the truck water pump are the water neck location interfering with the headlight bracket, and the LT1 throttle body won't work unless you flip the sensor to the other side facing up instead of down, but then you run into hood clearance issues as the MAF sensor will now be higher than the manifold itself.
[You must be registered and logged in to see this image.]
I installed the corvette water pump and everything fits much better. However, the stock location for the alternator places it right where the power steering pump bracket is. I had to remove that bracket and even then, the alternator wouldn't fit as the headlight motor got in the way as well as the tabs coming off the alternator for the wire were hitting the fender hump around where the power steering bracket was. After some research, I noticed the LT4 and the LT1 Camaro place the alternator under the water pump pulley. I have now placed the alternator in the new location with a sort of hybrid setup using the corvette water pump housing for clearance between frame rails as well as headlight hinges and Camaro alternator location. I need to order the alternator bracket for the Camaro so that the belt tensioner pulley can be added to the setup.
Unfortunately, I don't see how an AC compressor will fit within the whole front drive accessories for anyone wanting to retain AC (I'm one of those people seeing as I live where it gets really hot)
My next project is to figure out mounting for the power steering pump. It will have to go on the drivers side of the engine most likely as it's pretty much the only spot available now.
I've also purchased the Holley Terminator X Max engine management for the Gen 5 LT1. Waiting to finish all the engine install work before I put the harness on. But everything on it looks really good. Everything is labeled and well made.
It's been an interesting, and at times, frustrating journey. I feel like I solve one problem then unlock two new ones
If anyone else is doing this swap, I'd love to hear and see any progress and see what problems there were and how they were solved. And hopefully my work can help anyone else who may not be as far along and save some headaches and save money with not buying wrong parts.
Babineaux- Posts : 20
Join date : 2020-04-23
Re: My Gen 5 LT1 Build
![]() Babineaux Sat Mar 06, 2021 3:07 pm
Babineaux Sat Mar 06, 2021 3:07 pm
So my initial thought on the LT1 water pump was that it was the better option of the three different water pumps. Truck, LT1 Corvette & LT1 Camaro.
Although the inlet and outlets are placed much better on the Corvette pump, there are other issues that you may or may not be bothered by. I just want to present the various findings I've come across to help anyone else down the line should they be attempting this swap and want to avoid frustrations.
L86 Truck water pump - neck crashes with the headlight bracket. If using the corvette intake manifold, you will need to flip the throttle body so the MAF is facing upwards so it doesn't interfere with the water pump. This in return, causes hood clearance issues. Depending on your hood situation, this may or may not be an issue to you. These are just my findings. I'm trying to keep an OEM look rather than cutting my hood to show the goodies.
Corvette Water pump - Places the water inlet and outlet in a much better position. Allows for normal use of the LT1 intake and throttle body position and helps with hood clearance. The downside is that the alternator won't fit in the designed location on this pump. It hits the fender even after removing the power steering reservoir. And the pulley on the alternator will be against the headlight motor should you decide to keep pop-up headlights. You can remedy this by placing the alternator down by the balancer. The corvette places the AC compressor there along with a belt tensioner, but the Camaro and LT4 place the alternator there. You will need to buy the bracket for that along with the associated belt tensioner. Also, the outlets for the heater lines are about 1/4" away from the frame rail. I think it may be possible to get hoses in there to loop them as normally done, but it will be a frustration you have to deal with if you opt for this water pump.
[You must be registered and logged in to see this image.]
Here you can see where the alternator is intended to be mounted:
[You must be registered and logged in to see this image.]
And the clearance issue with the heater line outlets:
[You must be registered and logged in to see this image.]
And to give an idea of spacing and headlight motor distance for the alternator pulley clearing...
[You must be registered and logged in to see this image.]
All in all, I think this is a potential water pump with the main issue being the heater outlets being against the frame rail. The alternator is an easy thing to relocate (which you can see in some photos mounted below the water pump pulley) and you can just trim off the old bracket for it on the pump to clean up the aesthetics. I've been doing more research and I may try the Holley mid-mount setup next which looks like you may be able to run an AC compressor (on the wrong side though, so custom lines would have to be made, which is something I don't like) I'm really looking for a nice and tight placement and one that looks clean and simple. For me, the Corvette water pump with the Camaro/LT4 alternator placement is a good backup option. And then will either fabricate or find a setup that exists that mounts the power steering pump a little lower and on the drivers side. A lot of these swap brackets are for guys with football fields worth of room in the engine bay and places things in areas that doesn't work well for the tight space we deal with in the 944.
And just to give some photos for measurement/ reference for anyone needing it, here are some photos to help for what ever you may need them for. This is measuring from the edge of the heads to the headlight bar. The passenger side has more space compared to the drivers side.
[You must be registered and logged in to see this image.]
And here's the LT1 intake manifold in relation to the hood latch. Please note though, the hood clearance will be an issue no matter what. I believe only a small section of the bracing down the middle rib will need to be removed for the hood to close normal. It's a very tight space to get an intake elbow in and have looked into a cobra head elbow, but haven't found one to purchase yet with a 4" diameter. So even if you get the hood clearance, just know the intake elbow will be the next thing to tackle. I will revisit this issue a little later after I finish figuring out the Front End Accessory Drive (FEAD) setup.
[You must be registered and logged in to see this image.]
At times, I sort of feel I'm flying solo here, but again, if anyone else is attempting this swap, or comes across this thread, I'd love to hear what others are doing for their setups and how they're solving any of these issues or issues I may not have even come across yet. I think the headers are going to be a pain on the drivers side due to steering shaft and frame rail. If anyone has solved that, it may save me some headaches
Babineaux- Posts : 20
Join date : 2020-04-23
smkn951 likes this post
Re: My Gen 5 LT1 Build
![]() Rich L. Tue Apr 20, 2021 11:39 am
Rich L. Tue Apr 20, 2021 11:39 am
Rich
Rich L.- Posts : 928
Join date : 2011-05-30
Location : Seattle
Re: My Gen 5 LT1 Build
![]() Babineaux Fri Apr 30, 2021 9:39 pm
Babineaux Fri Apr 30, 2021 9:39 pm
Rich L. wrote:Nice progress! The driver side header is tough, yes. How different is the Gen5 LS manifold from the Gen4? Could the existing Gen4 headers from TPC or Renegade work? I have the TPC long tubes and they worked great in that tight spot. G'Luck!
Rich
Hey Rich, I'm not sure if there's a difference in the spacing of each exhaust port but there is a difference in the bolt patterns between the LS and the LT flanges. I think I'll have to either fabricate my own or buy a cheaper set of headers from Speed Engineering that are close to what I need and then cut/modify sections as needed. Looking at Camaro headers most likely since the shape of the bends look somewhat close to what I would need and may require less rework, or something similar to the Kooks LT1 swap headers for the 1967-1969 F Body (PN-70101352-RHKR) which looks like it has an opening to allow the steering to pass through. Just not sure if the #1 & #2 ports would interfere with the motor mount. Just a lot of money for a header experiment or to hack up.
Babineaux- Posts : 20
Join date : 2020-04-23
Re: My Gen 5 LT1 Build
![]() Babineaux Fri Apr 30, 2021 11:14 pm
Babineaux Fri Apr 30, 2021 11:14 pm
Hopefully this isn't clear as mud since I'm super tired while writing this...
Wanted to make a note about the water pump situation for anyone who may come across this and may not be aware.
- The impellers on the water pumps are different according to the direction of rotation of the belt routing. Note that the vertical portion of the impellers are located on different sides depending on which direction it spins.
The Camaro LT1 and Silverado L86 water pumps; Those rotate clockwise.
[You must be registered and logged in to see this image.]
The Corvette LT1 water pump rotates Counter-Clockwise.
[You must be registered and logged in to see this image.]
Now, where this is causing me a small headache is; The corvette water pump housing is the only one that seems to work as far as clearances and keeping pop-up headlights. However, since the alternator doesn't work in the spot intended and has been moved down below; This has caused a new belt routing which will make the corvette water pump rotate in the wrong direction. I can swap over the Camaro/Silverado water pump as it all bolts up and the rotation/impellers would now be correct.
However! This is the part I can't get any clear answer on. Not from GM, not from Meziere or other water pump manufactures. - The two style pumps rotate in opposite directions (Corvette vs. Camaro/L86); But do the water housings themselves flow in the same direction, or do they flow in opposite directions also? Reverse flow from each other AND reverse rotation? Or both have same flow direction, but with different pump rotations. If they all flow in the same direction, I can swap the pumps and it's all good. But if they are reverse flow of each other, swapping the pumps won't work and the cooling won't work well. And it drives me nuts that not even GM themselves can give me an answer or Manufacturers of performance water pumps can't tell me this information either. If anyone knows, if the housings themselves flow the same direction or if they're reverse flow of each other, please let me know!
Since I couldn't find answers, I started looking at remote mount electric water pumps, spoke with Meziere and other manufactures and was told by everyone not to go that route as the air flow to everything in the 944 isn't very good for cooling and a mechanical pump is best as it operates off the engine and can ramp up speed/flow as the RPM's go up instead of an electric pump that is the same flow rate no matter what.
I may end up just throwing in the Camaro/Silverado water pump into the Corvette water pump housing and just see what happens. The image below is something I may replicate as far as the Alternator bracket, tensioner and alternator location using the Corvette housing and the Camaro/L86 Pump for proper rotation direction.
[You must be registered and logged in to see this image.]
This seems far more complicated than what it needs to be
Ultimately, I only need to figure out the cooling situation, headers and get fuel up to the engine and then I can finally start trying to fire everything up. This last bit seems to be the most difficult. out of everything on this swap.
And for anyone who may stumble across this with a 911, I did see a guy on other forums who put the Camaro LT1 into his 996 I believe, and from looking at his photos, I can definitely say the 911 has more room compared to the 944 and none of my struggles seem to be anything he had to worry about.
That's all the update I have for now. Until I conquer the Cooling and Header hurdles, it'll be somewhat slow going unfortunately as I'm slow to pull the trigger on purchases until I've done as much research as possible cause it sucks spending a lot of money to get the parts in and they don't work like you thought they would. Learning mistakes aren't cheap

Babineaux- Posts : 20
Join date : 2020-04-23
Re: My Gen 5 LT1 Build
![]() superman22x Wed Feb 23, 2022 10:46 am
superman22x Wed Feb 23, 2022 10:46 am
Have you looked into L84/L87 water pump? They sit in the middle more like a traditional LS water pump. You can also adapt an LS water pump to the gen 5.
Alternatively, if you have another spot for the alternator, maybe you could make a small idler pulley bracket near where the alternator would be so you can wrap the belt the correct way on that. If you switch the pump out, I believe you would be changing the direction of flow. Just take that into account when making your radiator connections, and I believe it would be fine. Thermostat would be on the other end of the cooling system, but that is similar to how LS engines are routed, so it may work out. Maybe worth a shot?
It's a more difficult swap, but it's worth it in the end. I used to have an LS3 944, and now I have the LT1 997. The LT1 is an awesome engine.
superman22x- Posts : 272
Join date : 2015-01-29
Re: My Gen 5 LT1 Build
![]() Hotrodz of Dallas Wed Feb 23, 2022 11:03 am
Hotrodz of Dallas Wed Feb 23, 2022 11:03 am
[You must be registered and logged in to see this link.]
Hotrodz of Dallas- Posts : 615
Join date : 2015-10-31
Age : 65
Location : Dallas-Ft. Worth
Re: My Gen 5 LT1 Build
![]() Babineaux Wed Feb 23, 2022 11:27 am
Babineaux Wed Feb 23, 2022 11:27 am
One area i'm still working on is the intake elbow. There is zero room between the throttle body and the hood latch assembly. Really trying to avoid hood pins if possible. I just like the cleaner look. I've ordered a cobra head elbow which i'm hoping will work, but again, i'll throw that into the development cost category. Should be here in the next day or two along with a few other parts and hopefully the L87 pump that has the correct areas drilled and tapped.
Superman22x -
You're spot on! I ended up getting the L87 water pump after trying every other option. However, two of them that I ordered are missing some tapped areas to mount a belt tensioner and so on (will show photos when I do a proper update). I have now ordered a third and trying to return the other two. Never buy parts from GM Parts Direct. They don't answer phones and don't reply to emails etc. Wish I looked at reviews of them prior to buying. So now I'm eating the cost of "development" we will call it lol. I unknowingly assembled the same setup that Swap Time USA has created for the Gen 5 minus the power steering bracket. So I'd like to reach out to them and see if I can purchase just that out of the drive kit.
I test fit the L87 pump and everything looks good. The bell of the pump itself sits pretty close to the radiator so i'll be figuring out a low profile fan setup. looking at SPAL fans (puller) And may not be able to do a fan shroud. Could switch to pusher fans, but would like to keep the AC Condenser.
Hotrodz of Dallas -
That setup looks pretty nice, but more money than what I'd like to spend. That AC compressor looks nice and compact though. Which space is a major concern as the motor mounts take up some of the area where the compressor would be. Praying I can keep AC in the southern heat! But the depth of the compressor will be critical so it doesn't hit the motor mounts I have.
This weekend I'll take some photos and do a proper build update.
Babineaux- Posts : 20
Join date : 2020-04-23
Page 1 of 2 • 1, 2 ![]()
» LEAKING TPC HYDROBOOST
» Best engine uprights/plates
» 944 Turbo TPC Radiator Install Help Needed
» Fesler Saratoga Top
» Rear coilover suspension setup
» Ray's 1987 944 LS1 Build & Swap
» LS 982 5speed project here
» LT1 Spark Plug make and model
» 928 5-speed kit