
 Latest images
Mon Jul 08, 2013 3:56 pm by Admin
For the benefit of 944Hybrids users there are two search functions available for you to use.
The purpose of this sticky is to explain the "Advanced Search" function because it is much more powerful and is the best choice when researching information.
When you log on to the site a list of options is shown in a line at the top of the page. One option is labelled "Search", use this option (NOT the search box lower down on the right).
After you click on the upper search option, a drop down box appears. At the bottom of this box is a radio button marked "Advanced …
Comments: 0
Ray's 1987 944 LS1 Build & Swap
Page 2 of 14 •  1, 2, 3 ... 8 ... 14
 ![]()
Re: Ray's 1987 944 LS1 Build & Swap
![]() Raymond-P Sun Sep 07, 2014 9:46 pm
Raymond-P Sun Sep 07, 2014 9:46 pm
The thread I've been posting is behind my actual work just a bit as the engine in done and "lurking" in my garage on engine feet.
[You must be registered and logged in to see this image.]
One more post on the TCP pan installation and then a re-post of my adventures with the SPEC flywheel, clutch, and pressure plate package, and that's it for the engine build.
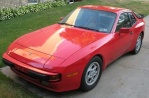
I am preparing the car now to do the swap but it has not run for like 6 years. I wanted to video the 2.5 16V engine running to support my sale efforts, but no luck starting it. (It needs a water pump...that's what grounded her.) Replaced the battery and fuel relay....nothing. The pump is simply not energizing. I'm in the process of changing the pump and fuel filter.
Below is the challenge at hand...no pun intended!
[You must be registered and logged in to see this image.]
What a mess...cleaning this gunk out of the tank is my next sub-project.
Last edited by Raymond-P on Sun Sep 07, 2014 10:39 pm; edited 1 time in total (Reason for editing : Thought I should add a pic of)
Raymond-P- Posts : 385
Join date : 2013-06-29
Age : 68
Location : Beaver, PA
Re: Ray's 1987 944 LS1 Build & Swap
![]() Rich L. Tue Sep 09, 2014 12:58 pm
Rich L. Tue Sep 09, 2014 12:58 pm
Your engine build looks great. Perhaps you already know, but I suggest some heat shielding on the driver's side while the engine is out. I used a product from DEI.
[You must be registered and logged in to see this link.]
Rich L.- Posts : 928
Join date : 2011-05-30
Location : Seattle
rascalray- Posts : 5
Join date : 2016-05-16
Porsche Project Restart...
![]() Raymond-P Mon Jan 28, 2019 12:46 am
Raymond-P Mon Jan 28, 2019 12:46 am
Raymond-P- Posts : 385
Join date : 2013-06-29
Age : 68
Location : Beaver, PA
Re: Ray's 1987 944 LS1 Build & Swap
![]() sharkey Mon Jan 28, 2019 1:52 pm
sharkey Mon Jan 28, 2019 1:52 pm
sharkey- Posts : 714
Join date : 2014-11-21
Age : 39
Location : Abbotsford BC
Re: Ray's 1987 944 LS1 Build & Swap
![]() Raymond-P Sat Feb 09, 2019 6:52 pm
Raymond-P Sat Feb 09, 2019 6:52 pm
Also I see you rebuilt your transaxle. I picked up an '86 16R 5P Turbo transaxle (non-LSD) with oil cooler to replace my 83D AGP. It was advertised as being in good condition with about 90K miles. A rebuild may be prudent but I'm anxious to get this car running and back on the road!
If you have any narrative that goes with your photo album, I'm interested.
Raymond-P- Posts : 385
Join date : 2013-06-29
Age : 68
Location : Beaver, PA
TPC OIL PAN
![]() Raymond-P Sat Feb 09, 2019 11:12 pm
Raymond-P Sat Feb 09, 2019 11:12 pm
TPC returned my Pan and Pick-up tube in short order. It was evident that the pan had been modified to clear the pick-up tube. With the front and back cover on and the pick-up tube installed, I did a quick leak test on the pan using water and then cleaned it all up in preparation for installation. This included a light coat of motor oil on any bare steel. Below are pics of the inside and outside of the TPC modified Milodon Racing Pan.
[You must be registered and logged in to see this image.]
The next step is important in any engine build and vital if you have a stroker and/or modified the windage tray. You must check the clearance between he pick-up tube screen and the bottom of the pan. GM specifications on this dimension is 1/4”– 3/8” in order to permit proper oil intake volume. To check this, I set a piece of hi density foam that was about 7/16” thick on top of the pick-up and positioned the pan in place.
[You must be registered and logged in to see this image.]
I was happy when the pan set flush with the block and did not contact the foam, even without the gasket. Good to go!
The next check was to verify that the rear cover was no more than 0.020” above the oil pan mating surface of the block…. I used my pry bar as a straight edge. The gap must be the same on both sides.
[You must be registered and logged in to see this image.]
Exactly 0.020…both sides.
Next, I filled the corner gaps with Permatex Blue just for insurance…While I was at it, I put a thin film on the entire unpainted mating surface of the oil pan just for some measure of corrosion protection.
[You must be registered and logged in to see this image.]
Next a new GM oil pan gasket GM#12612350 ($35) is set in place dry, followed by the oil pan.
[You must be registered and logged in to see this image.]
Pan bolts were tightened to 18 ft-lbs. each, including two temporary bolts where the TPC Oil Filter adapter will go… that’s next.
Last edited by Raymond-P on Tue Mar 05, 2019 9:45 pm; edited 3 times in total (Reason for editing : Title Change)
Raymond-P- Posts : 385
Join date : 2013-06-29
Age : 68
Location : Beaver, PA
Re: Ray's 1987 944 LS1 Build & Swap
![]() sharkey Sat Feb 09, 2019 11:37 pm
sharkey Sat Feb 09, 2019 11:37 pm
Raymond-P wrote:sharkey...Just finished checking out your swap pics. Very impressive, you have a lot of skills! 400 hp is GREAT! When I get there I want to get more scoop on how you handled the replacement brake master cylinder.
Also I see you rebuilt your transaxle. I picked up an '86 16R 5P Turbo transaxle (non-LSD) with oil cooler to replace my 83D AGP. It was advertised as being in good condition with about 90K miles. A rebuild may be prudent but I'm anxious to get this car running and back on the road!
If you have any narrative that goes with your photo album, I'm interested.
ive got a few threads on here about various points in my build. in the "other conversions" section i have my main build thread, although many of those pics are now broken links. i have a thread in the brakes section about my my dual master cylinder setup, and a thread in the transmission section about rebuilding my AOR transaxle.
for your transaxle, rebuilding it may not be necessary, the main reason i went through mine was was just to have a look-see. i ended up powder coating the cases, added the case stiffening plate (something id recommend) and to swap 5th gear. i would say if your not experienced in manual transmissions and specifically transaxles, this isnt really something you want to learn on, they are quite complex and parts are expensive if you make a mistake. swapping 5th gear however is something thats simple enough to do on your own, and so is the case stiffening plate. your going to want to tackle the 5th gear swap before you put the trans in, you dont need to be buzzing a v8 down the highway at 2600 rpm at 60mph.
sharkey- Posts : 714
Join date : 2014-11-21
Age : 39
Location : Abbotsford BC
Re: Ray's 1987 944 LS1 Build & Swap
![]() Raymond-P Wed Feb 13, 2019 10:31 pm
Raymond-P Wed Feb 13, 2019 10:31 pm
Raymond-P- Posts : 385
Join date : 2013-06-29
Age : 68
Location : Beaver, PA
TPC OIL FILTER ADAPTER
![]() Raymond-P Sun Feb 17, 2019 12:55 am
Raymond-P Sun Feb 17, 2019 12:55 am
[You must be registered and logged in to see this image.]
The thick mounting flange of the TPC oil filter adapter requires longer pan bolts than stock. The quick fix was to cut down 2 of my unused stock M8 head bolts to the required 35 mm UHL.
[You must be registered and logged in to see this image.]
Left to right, stock pan bolt, stock M8 head bolt, M8 head bolt cut to 35 mm UHL
I used blue Loctite for the mounting bolts and some Lucas lube for the O-rings. The mounting holes in the pan flange required some reaming to get all 4 bolts installed. Not a big deal...just be sure to capture all those metal shavings!
[You must be registered and logged in to see this image.]
Lastly, the 2 M6 long bolts for the back of the stock LS1 pan cannot be used for the TPC pan. I purchased some new M6 1.0 x 25mm units to do the job.
[You must be registered and logged in to see this image.]
Elected to use a “break-in” STP Oil filter S10060. Suggested service units include: LS 1001, WIX# 57060, and Fram# PH10060.
Last step here was to bolt on the factory oil filter adapter cover with some shiny new bolts. I didn’t torque this cover down yet as I’m still debating the need for an oil temperature sending unit. If I go for it, I will need to tap the cover for a sending unit. As an option, I could purchase the C5 cover (Part # 12551587 for $31) which is already tapped with a M12x1.5mm thread for the C5 Temperature Sending Unit (Part #12608814 for $24).
[You must be registered and logged in to see this image.]
Next up, a recap of the Flywheel, Pressure Plate, and Clutch Set-up…. These will likely be links to my previous posts elsewhere on this forum.
Last edited by Raymond-P on Sat Feb 05, 2022 8:17 pm; edited 2 times in total (Reason for editing : Title Edit, SP correction)
Raymond-P- Posts : 385
Join date : 2013-06-29
Age : 68
Location : Beaver, PA
TPC PILOT BEARING & FLYWHEEL
![]() Raymond-P Sun Feb 17, 2019 7:37 pm
Raymond-P Sun Feb 17, 2019 7:37 pm
So, to capture the build process sequentially without all the cross-referencing I’m going to update my old posts here in this thread and add some of the missing moments. If you want to go back and see the original 2014 post and dialog with other forum members, below is the 1st link:
Anti Seize on LS1 Pilot Bearing Adapter?
[You must be registered and logged in to see this link.]
So here is my rewrite on the pilot bearing adapter and flywheel.
The factory issue pilot bearing (GM - PC381 CP06), in my LS1 manual crank, was undamaged but gets replaced with the TPC Pilot Bearing Adapter to fit up the Porsche torque tube drive shaft.
[You must be registered and logged in to see this image.]
The first order of business was pulling the old bearing. I borrowed a pilot bearing puller from my local Advance auto parts store ($38 deposit) but it just didn’t work. Seems it was designed for solid bushing type bearing units. Next, I tried a hammer type puller from AutoZone ($160 deposit- ouch!). Both are shown below.
[You must be registered and logged in to see this image.]
Removal is not supposed to be difficult but mine turned out to be a stubborn beast… especially considering you must be careful about hammer blows to the LS1 crank to not damage the main bearing seals. To get it done, I used the pipe and washers from my homemade harmonic balancer installation tool to take all the play out of the hammer tool. Several light blows with the slide hammer then tighten the nut…rinse and repeat until it’s out. It was slow going until I drilled a couple stress relief holes in the old bearing…seemed to help.
[You must be registered and logged in to see this image.]
After some general cleanup, I opted to install the flywheel before the pilot bearing adapter. The unit provided by TPC is the SPEC steel flywheel SC75S, and I purchased ARP #070-330-2802 Pro Series 190 ksi Flywheel bolts, M11 x 1.50” (UHL 0.880”) at a cost of $33.10.
[You must be registered and logged in to see this image.]
Important installation Check List items include:
1. Cleanup of the 11mm threaded holes in the crank flange to ensure proper torque…Check!
(They really needed it!)
2. Be sure flywheel bolt holes are chamfered to properly accept the ARP bolts…Check!
3. Apply ARP flange lube and blue Loctite (242) on the bolt threads…Check!
4. Follow ARP installation instructions, torquing bolts to 85 Ft-lbs….Check!
[You must be registered and logged in to see this image.]
Since I’m kind of a one-man show, I needed some assistance to hold the crank from turning while torquing the flywheel bolts. Some bar stock and a few scrap bolts in the pressure plate mounting holes did the trick. I followed the ARP instructions using two passes to 85 ft-lbs.
[You must be registered and logged in to see this image.]
Now that the flywheel is on, installing the new TPC pilot bearing adapter is next. Below is the replacement TCP pilot bearing adapter Part# 6202RSD S ’75, Front & Back (engine side):
[You must be registered and logged in to see this image.]
To make a long story short, the TPC pilot bearing adapter should be machined to what is called an “interference” fit so that it’s OD is just about 0.001” bigger that the crank bore hole ID. This is all that is needed to prevent it from coming out on its own. Unfortunately, mine was not and I could put it in and remove it without tools. Not acceptable so I elected to have the adapter knurled which a friend of mine did on his lathe.
[You must be registered and logged in to see this image.]
I followed the advice once again of the forum experts, and used Loctite 609 retaining compound for insurance ($18 at Fastenal – ouch!). This adds pull-out resistance for gaps up to 0.005” and still allows mechanical removal without heat. I cleaned both contact surfaces with Brakleen and then applied the compound to both surfaces as directed. Perfect fit with a few light hammer taps.
[You must be registered and logged in to see this image.]
With the pilot bearing adapter in place, I wanted to check the clutch plate clearance so I first measured the gap between the adapter and the flywheel. Using my feeler gauges, I measured 0.080”. Now on the flywheel side of the SPEC clutch plate, the hub is flush with a slightly raised surface of the plate as required. See pics below:
[You must be registered and logged in to see this image.]
Clearance from the hub face to the face of the clutch material (1/8” thick on each side) measured 0.097”. Therefore, the total clearance (or gap) between the clutch plate hub and the pilot bearing adapter is 0.080” plus 0.097” or 0.177”. This confirms that the hub won’t ever touch the adapter even if the entire 1/8” (0.125”) of clutch material was completely gone. Good to go!
[You must be registered and logged in to see this image.]
I placed a skin coat of Permatex anti-seize in the pilot bearing adapter before starting the clutch and pressure plate install. That’s next…
Last edited by Raymond-P on Tue Mar 05, 2019 9:51 pm; edited 1 time in total
Raymond-P- Posts : 385
Join date : 2013-06-29
Age : 68
Location : Beaver, PA
TPC Clutch Disc and SPEC Pressure Plate
![]() Raymond-P Sat Feb 23, 2019 9:45 pm
Raymond-P Sat Feb 23, 2019 9:45 pm
[You must be registered and logged in to see this image.]
Along with a clutch positioning tool, the kit also included YFS Class 12.9 (170,000 psi) Alen Head Cap Screw PP fasteners with lock washers. For comparison, an SAE J429 Grade 8 bolt has a tensile strength of 150,000 psi.
[You must be registered and logged in to see this image.]
Just FYI: YFS is the Fang Sheng Screw Co., Ltd which is one of the world's largest manufactures of Socket screws. Founded in 1979, YFS offers a broad line of quality Socket products and services. YFS has grown into the world’s Premier global provider of valued-based Socket head products. YFS products are manufactured from high tensile alloy steel, Class 12.9 and ASTM A574 for industrial machinery, electric appliances, automotive vehicles, military equipment and many other industrial products. YFS offers the highest quality fastener in the World, meeting all the manufacturing standards globally
While surfing around for torque specs from SPEC, I came across the following info on the LS1Tech Forum:
"Our single-disc assemblies are intended to use the OE torque specs for both the pressure-plate to flywheel and the flywheel to the crank. Let me know if you have any further questions. Thanks,
__________________
J. Auvil
Sales and Tech Manager
SPEC, Inc.
800-828-4379 x.109
[You must be registered and logged in to see this link.]
For a 2001 GM 6-speed manual, the pressure plate bolt torque spec is 52 ft-lb.
The first step is to apply blue Loctite to the cap screws. Then, using the clutch disc positioning tool to hold the disc in place, I installed the PP with the fasteners finger tight only. After checking that the clutch disc was centered, I tightened the PP cap screws in a star pattern using two passes, 1st at 35 ft-lbs and then 52 ft-lbs. A simple pry bar worked fine to lock the rotating assembly.
[You must be registered and logged in to see this image.]
Next is the Throw-out Bearing and Bell Housing….
Raymond-P- Posts : 385
Join date : 2013-06-29
Age : 68
Location : Beaver, PA
Re: Ray's 1987 944 LS1 Build & Swap
![]() turbobob924 Sun Feb 24, 2019 3:51 pm
turbobob924 Sun Feb 24, 2019 3:51 pm
Sent from Topic'it App

turbobob924- Posts : 218
Join date : 2009-06-16
Location : Hinckley Ohio -

Re: Ray's 1987 944 LS1 Build & Swap
![]() Raymond-P Sun Feb 24, 2019 6:20 pm
Raymond-P Sun Feb 24, 2019 6:20 pm
If nothing else, posting all of this saves me from trying to remember it all.
In a couple weeks...the engine swap phase is going to start. Very excited!
Raymond-P- Posts : 385
Join date : 2013-06-29
Age : 68
Location : Beaver, PA
Re: Ray's 1987 944 LS1 Build & Swap
![]() turbobob924 Sun Feb 24, 2019 6:22 pm
turbobob924 Sun Feb 24, 2019 6:22 pm
Do you have the mounts and headers yet?
Sent from Topic'it App
turbobob924- Posts : 218
Join date : 2009-06-16
Location : Hinckley Ohio -
TPC Throw-out Bearing
![]() Raymond-P Sun Feb 24, 2019 8:01 pm
Raymond-P Sun Feb 24, 2019 8:01 pm
Mystery Plate - do I need this thing??
[You must be registered and logged in to see this link.]
[You must be registered and logged in to see this image.]
I started the old thread because I misplaced the instructions concerning use of the “mystery plate.” Before I finally found it, I was advised by Techno Duck that the plate is a .115" shim that goes in between the concentric hydraulic slave/bearing assembly (throw-out bearing) and the billet TPC adapter plate. He highly recommended doing a clearance check to see if I needed the shim for my application, noting that every car is a bit different. He also provided this link to the Ls1tech Forum on the subject:
[You must be registered and logged in to see this link.]
Xschop also provided me similar advice and noted relevant differences by brand for overall throw-out bearing dimensions. With good advice in hand, I was compelled to perform the clearance check.
As I began to review all that transpired, it was apparent that some of my recordation was not clear. This time around, my goal is to condense and clarify what transpired and confirm that my clearance check was valid.
To get started, I think it’s important to understand exactly why all these measurements are relevant to clutch performance. Below is my understanding, which as always, is subject to correction and/or edit by the forum experts:
A) For complete power transfer from engine to transmission, effective clutch disc engagement is
accomplished by virtue of the pressure plate delivering its full clamping force.
B) Conversely, to facilitate a smooth transmission gear shift, effective clutch disc disengagement is
accomplished by removing the clamping force though activation of the throw-out bearing to apply
force on the pressure plate diaphragm fingers.
C) The positioning and travel of the throw-out bearing is critical for the pressure plate to accomplish
these actions and the static clearance between the diaphragm fingers and the contact surface of
the unactuated throw-out bearing is the clearance measurement to check.
D) Below are some advertised specifications for this clearance that satisfy this requirement and allow
for clutch disc wear over time:
a. Stock GM LS1 applications – 0.125" and 0.200”
b. SPEC component packages – 0.175 and 0.250”
E) Checking the clearance measurement is a must for any combination of components not pre-
engineered to work together. The TPC component combination for this build appears to meet this
definition and includes…
a. GM C5 bell housing
b. SPEC flywheel & pressure plate
c. “Conversion” clutch disc – undisclosed brand
d. Concentric hydraulic slave/bearing assembly – undisclosed brand
F) TPC has done the engineering for this combination and in 2014 I was told that it has worked in
over 50 builds without issue.
For the record, I’m going to retrace my clearance check to show that the TPC combination produces the desired clutch performance. This involves three relevant dimensions.
1) The first relevant dimension defines the boundary conditions of the working clutch and pressure
plate assembly, namely the distance from the engine block to the face of the TPC torque tube
adapter plate. This is a set dimension equal to the depth of the bell housing or “clutch housing” as
GM calls it.
2) The second relevant dimension defines the position of the pressure plate diaphragm fingers within
the boundary conditions. This dimension varies depending on component design and is
established by measuring from either boundary front or back. In the guidance I’ve seen, the
distance to the back-boundary condition or torque tube adapter plate is used in the clearance
calculations, and it is referred to as measurement "A.” The clutch and PP assembly must be in
place and properly torqued.
3) The third relevant dimension is the distance from the TPC torque tube adapter plate to the throw-
out bearing contact surface that engages the diaphragm fingers. Again, this dimension is variable
depending on the component manufacturer and is referred to as measurement “B.” To get an
accurate measurement, the slave spring must be removed, and the bearing must be fully seated
at the bottom of its travel; resting on the slave's base.
Measurement A must be bigger than measurement B to prevent unintentional force constantly applied to the diaphragm fingers, and this difference, A minus B (A-B) is the throw-out bearing clearance measurement. With all new components, A-B could be very small without consequence. However, A-B must also allow for future clutch disc wear which decreases A-B over time. Using GM numbers, let’s say 1/32” (0.031”) satisfies clearance requirements for new components. If the acceptable throw-out bearing clearance range is 0.125” to 0.200” as listed, and 0.031” accounts for static clearance, that leaves 0.094” to 0.169” to account for clearance reduction due to clutch disc wear.
[You must be registered and logged in to see this image.]
I took a closer look at the TPC clutch disc and it's a total of 3/8" thick with exactly 0.125" (1/8") of material on each face. Of that, only 0.033" (just a shade over 1/32") of material is usable (wearable?) before contact with the rivet heads and damage occurs to the flywheel and/or PP.
Clutch wear of 1/32” off each side results in pressure plate movement of 1/16" (0.0625) and impacts A-B at a factor of 1.5 to 2.7 times clutch disc wear. I don’t know for sure without measuring, but I would venture to say from my pictures that the working fulcrum for the SPEC PP diaphragm fingers is at about the 2/3 point from center to PP surface which will result in an even 2.0 leverage factor. That means 1/16” of wear will reduce the A-B clearance by 2.0 times 1/16” or 1/8” (0.125”).
My conclusion for the TPC package: Target clearance value for A-B would be 0.156.” This includes 0.031” (static clearance) + 0.125” (future disc wear clearance allotment).
Less clearance will result in premature clutch slippage and perhaps premature throw-out bearing failure. An A-B dimension over 0.200” could lead to difficult shifting because of insufficient clutch disengagement.
My Numbers and How I Got Them
The "A" measurement is from the PP diaphragm fingers to the transmission side of the bell housing. Since my C5 bell housing, hydraulic slave cylinder and TPC torque tube adapter plate came beautifully pre-assembled, and the PP was already on the flywheel, I couldn't measure this directly. Instead I measured from the PP diaphragm fingers to the back of the engine block on each side using a 4 ft level as a straight edge across the diaphragm fingers, and digital calipers. The right side measured 3.349" and the left side measured 3.359”so I used the average of 3.354." Then I subtracted this from the overall depth of the C5 bell housing which I measured to be 5.797" using the 4 ft level and my calipers. (Recall I had to add a 0.293" correction factor based on how I used the calipers.)
[You must be registered and logged in to see this image.]
My actual "A" dimension = 5.797" - 3.354" or 2.443"
The “B” dimension is much simpler. I ended up taking off the TPC torque tube adapter plate and removed the throw-out bearing slave cylinder assembly. While I had the slave cylinder out, I removed the tension spring and measured the compressed assembly height.
[You must be registered and logged in to see this image.]
My actual “B” dimension is 2.292."
Doing the math, A-B = 2.443” – 2.292” = 0.151” This is very close to my target of 0.156.”
IN CONCLUSION, I do not need the spacer shim.
I ran this by TPC about the same time I posted my original measuring adventure and was advised that when using the SPEC flywheel clutch & PP package with the GM Hydraulic Throw out slave bearing and C5 bell housing, they have never needed or used a shim. I learned from Xschop that the GM Hydraulic throw-out bearing assembly has a “B” dimension of 2.250” which is 0.042” shorter than the unnamed brand that was provided with the TPC kit. A-B with the GM unit would be 0.193” which is still within the acceptable range without the spacer plate.
[You must be registered and logged in to see this image.]
Xschop GM C5 Throw-out bearing diagram
I proceeded to reassemble the back of the bell housing. The throw-out bearing slave cylinder is bolted to the TPC torque tube adapter plate with 1/4” bolts torqued to 15 ft-lbs., same as delivered. I was advised by TPC that the billet adapter bolts to the bell housing should be torqued between 36 ft-lbs. and 52 ft-lbs. They were all just shy of 45 ft-lbs. when delivered so I reinstalled them all at 45 ft-lbs. and called it good.
One other positive thing came from the tear down....I learned that my JEGS bell housing bolts are shorter than stock units. 555-82511 BELL HOUSING BOLTS GM LS ($16) To compound that shortfall, they came with washers which I originally used. I elected to lose the washers this time around and re-installed them at 37 ft-lbs of torque with some blue Loctite. Below is the finished assembly with the C5 bell housing back in place.
[You must be registered and logged in to see this image.]
Not much left, starter is next….
Raymond-P- Posts : 385
Join date : 2013-06-29
Age : 68
Location : Beaver, PA
Re: Ray's 1987 944 LS1 Build & Swap
![]() Raymond-P Sun Feb 24, 2019 8:05 pm
Raymond-P Sun Feb 24, 2019 8:05 pm
I'm going to need a lot of interior work too....dash is garbage, carpet shot, seats need new leather.
Raymond-P- Posts : 385
Join date : 2013-06-29
Age : 68
Location : Beaver, PA
Re: Ray's 1987 944 LS1 Build & Swap
![]() turbobob924 Sun Feb 24, 2019 8:46 pm
turbobob924 Sun Feb 24, 2019 8:46 pm
I'm trying to document my swap better this time
Sent from Topic'it App
turbobob924- Posts : 218
Join date : 2009-06-16
Location : Hinckley Ohio -
Re: Ray's 1987 944 LS1 Build & Swap
![]() Raymond-P Wed Feb 27, 2019 12:26 am
Raymond-P Wed Feb 27, 2019 12:26 am
Raymond-P- Posts : 385
Join date : 2013-06-29
Age : 68
Location : Beaver, PA
turbobob924- Posts : 218
Join date : 2009-06-16
Location : Hinckley Ohio -
Starter & Bellhousing Dust Shield
![]() Raymond-P Wed Feb 27, 2019 11:02 pm
Raymond-P Wed Feb 27, 2019 11:02 pm
[You must be registered and logged in to see this image.]
My basket of parts did not include starter mounting bolts, so some new fastener “bling” was in order. I also noted after installing the bell housing that there was a gaping opening just behind the oil pan. I knew my basket of parts must be missing yet another piece. After some Internet shopping I ended up with ARP polished stainless steel 10mm bolts PN 430-3506, and a Canton stainless steel LS-1 Flywheel Cover PN 74-21-870 for $36 from JEGS.
[You must be registered and logged in to see this image.]
A good ground is paramount to good starter performance and the ARP bolts accomplish this with knurled surfaces in just the right places. A simple bolt on at 37 ft-lbs. got the job done.
[You must be registered and logged in to see this image.]
Installing the dust shield was simple with just 2 bolts. Unfortunately, the standard LS-1 bellhousing is apparently different than the LS-1 C5 bellhousing. Another consequence of being a Mopar guy. So now I have some small gaps on both sides that still need covered.
I still have some time to change out the dust shield if anyone out there can point me in the right direction. If not, I will end up modifying the one I have.
[You must be registered and logged in to see this image.]
Before I install the engine, I will be priming the oil galleries and testing the starter. So much easier out of the car!
That wraps up the back end of the engine for now… Next is the alternator and power steering pump.
Raymond-P- Posts : 385
Join date : 2013-06-29
Age : 68
Location : Beaver, PA
Re: Ray's 1987 944 LS1 Build & Swap
![]() turbobob924 Fri Mar 01, 2019 7:23 pm
turbobob924 Fri Mar 01, 2019 7:23 pm
Jumped + - on the 2 big connectors with a remote start button
Big arc
Killed it
Sent from Topic'it App
turbobob924- Posts : 218
Join date : 2009-06-16
Location : Hinckley Ohio -
Re: Ray's 1987 944 LS1 Build & Swap
![]() turbobob924 Fri Mar 01, 2019 7:24 pm
turbobob924 Fri Mar 01, 2019 7:24 pm
Damn auto correct
Sent from Topic'it App
turbobob924- Posts : 218
Join date : 2009-06-16
Location : Hinckley Ohio -
Alternator, Power Steering Pump, MAXJAX Etc...
![]() Raymond-P Tue Mar 05, 2019 9:14 pm
Raymond-P Tue Mar 05, 2019 9:14 pm
[You must be registered and logged in to see this image.]
My box of parts did not have alternator brackets or the idler pulley, so I turned to GM Parts Direct for new units and the bolts needed. Below is the tale of the tape:
GM#11516360 BOLT 5 @ $1.51 = $7.55
GM#11562302 BOLT 2 @ $2.78 = $5.56
GM#12556915 BRACKET - $12.42
GM#12563327 BRACKET - $45.72
GM#12563326 PULLEY - $40.84 (unbelievable!)
SUBTOTAL: $112.09
PROCESSING & HANDLING TOTAL: $29.72
Installing the alternator was easy enough once I had all the parts and figured out where they all went. Idler pulley goes on with one bolt. On to the PS pump. I removed the stock plastic pulley with a rented puller from AutoZone ($40) so I could clean the unit more thoroughly. Turns out it was a disaster waiting to happen because it was cracked, and failure was imminent.
[You must be registered and logged in to see this image.]
After some research, I opted for a new Turn One billet aluminum pulley ($85 + $15 S&H) so I could forget about any pulley issues.
[You must be registered and logged in to see this image.]
I postponed installing the Turn One pulley until after mounting the pump so I could align it properly with the alternator and water pump drum. Unfortunately, I soon discovered my basket of parts did not include all the necessary PS pump mounting hardware or the required tensioner pulley. This time it was ICT Billet to the rescue ($46) with a custom aluminum kit. I also picked up a new GM Tensioner Pulley GM 12560344 from Summit ($80 -ouch!).
[You must be registered and logged in to see this image.]
The ICT polished aluminum PS pump mounting plate is much more attractive than the stock plate. I installed the SS beveled head screws with blue Loctite, tightened to 37 ft-lbs.
[You must be registered and logged in to see this image.]
Mid and front brackets went on next, again with blue Loctite, tightened to 18 ft-lbs. Next I pressed on the Turn One PS pump pulley using the rental tool.
[You must be registered and logged in to see this image.]
With the pulley close, I put on the serpentine belt to check the alignment. After just a few turns the pulley alignment was right on.
[You must be registered and logged in to see this image.]
After getting this all together, the serpentine belt was not even slightly tight. The Goodyear GTR-4060790 ($23) that I purchased was correct for a stock LS1, so I was perplexed. Then it dawned on me that my decision to use an ATI Super Damper with 10% under-drive was the explanation. I guess I’ll be buying a new belt!
That wraps up the front of engine for now… Adapting the AC is on the radar, but I still need to research the forum for GM compressor compatibility with my Porsche AC unit. Perhaps a custom bracket for my Porsche AC compressor is the ticket.
Next up: The swap begins!
Below the finished motor gets closer to the car than it has ever been... and the hardware I recently installed to help with the "heavy lifting"
[You must be registered and logged in to see this image.]
Raymond-P- Posts : 385
Join date : 2013-06-29
Age : 68
Location : Beaver, PA
Re: Ray's 1987 944 LS1 Build & Swap
![]() Kiltacular Jim Fri Mar 15, 2019 4:06 pm
Kiltacular Jim Fri Mar 15, 2019 4:06 pm
Kiltacular Jim- Posts : 15
Join date : 2018-08-29
Age : 33
Location : St Louis, MO
Page 2 of 14 • 1, 2, 3 ... 8 ... 14 ![]()
» LEAKING TPC HYDROBOOST
» Fesler Saratoga Top
» Parts availability for general maintenance?
» What coilover spring rates are you running with torsion bar removed?
» 944 Turbo TPC Radiator Install Help Needed
» HYDRAULIC THROWOUT/RELEASE BEARING NOT ENGAGING FULLY
» Best engine uprights/plates
» Rear coilover suspension setup
» Ray's 1987 944 LS1 Build & Swap