
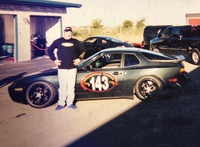
 Latest images
Mon Jul 08, 2013 3:56 pm by Admin
For the benefit of 944Hybrids users there are two search functions available for you to use.
The purpose of this sticky is to explain the "Advanced Search" function because it is much more powerful and is the best choice when researching information.
When you log on to the site a list of options is shown in a line at the top of the page. One option is labelled "Search", use this option (NOT the search box lower down on the right).
After you click on the upper search option, a drop down box appears. At the bottom of this box is a radio button marked "Advanced …
Comments: 0
rebuilding and upgrading my AOR, with pics
944Hybrids: 924/944/968 and 928 V8 Conversions :: Technical Stuff (other than motors) :: Transmission and Clutch Tech

rebuilding and upgrading my AOR, with pics
![]() sharkey Tue Jan 10, 2017 2:00 am
sharkey Tue Jan 10, 2017 2:00 am

to get the 5th gear bearing bolt off i used a spare input shaft coupler in the vice

rear housing removed, this is 5th gear

diff cover removed, thats the gear that drives the cooler pump

front case removed

removing the rear bearing race. a puller that big isnt needed, a 3 jaw will work fine, but having a proper gear puller makes it really easy

here is the rear housing, this is where the stiffening plate goes

here is the stiffening plate on the center housing

at this point im a little sceptical on the whole idea of the stiffening plate. i get the idea, but looking at it on the case and it doesnt seem that it would do much. im also a little worried about the plate restricting the return cooler flow. the cooler inlet is directly being the one shift rail, but it has a clear path to move into the main case. with the plate in place it would hit the plate and have to run down by the bearing. my biggest concern is the rear section will end up filling way up with oil and it could end up with oil frothing, and possible starve the front of the case. these are just some initial observations, i need to look into that some more.
i pulled the diff apart but forgot to take pics, ill grab some tomorrow.
Last edited by sharkey on Tue Jan 10, 2017 5:03 pm; edited 2 times in total
sharkey- Posts : 714
Join date : 2014-11-21
Age : 39
Location : Abbotsford BC
Re: rebuilding and upgrading my AOR, with pics
![]() scryfst Tue Jan 10, 2017 6:01 am
scryfst Tue Jan 10, 2017 6:01 am

scryfst- Posts : 82
Join date : 2012-05-16 -

Re: rebuilding and upgrading my AOR, with pics
![]() 944_GASM Tue Jan 10, 2017 7:38 am
944_GASM Tue Jan 10, 2017 7:38 am
I have an AOR that I will be needing to rebuild as well. Unfortunately I do not have any experience in transmission rebuilds, so I was sending it Kevin Gross, but haven't gotten around to it. Interesting to see its "guts" per say.
Do you or anyone else find the stock diff substantial to use with the LS swap, or does most everyone upgrade?
944_GASM- Posts : 68
Join date : 2015-07-23
Age : 33
Location : Buffalo, NY
Re: rebuilding and upgrading my AOR, with pics
![]() sharkey Tue Jan 10, 2017 1:02 pm
sharkey Tue Jan 10, 2017 1:02 pm
many people who race will go with an aftermarket diff. im going to run the factory diff, im just going to put the thicker external spline discs in to stiffen it up a little.
sharkey- Posts : 714
Join date : 2014-11-21
Age : 39
Location : Abbotsford BC
Re: rebuilding and upgrading my AOR, with pics
![]() sharkey Tue Jan 10, 2017 11:17 pm
sharkey Tue Jan 10, 2017 11:17 pm

the guts taken out the the case

the spider gears

the clutch clutch plates

for those that may have looked into the plates in the lsd that are available, the steel plate with the 4 tangs is the selectable one, available in 1.9mm, 2.0mm and 2.1mm. this diff has the 2.0mm ones in it. my breakaway torque before disassembly was 23 ft/lb, or 31 n m. im trying to remember the spec (i looked it up the other day and cant find it again) but thats on the high side. im planning to install the 2.1mm plates to stiffen the diff up a bit.
sharkey- Posts : 714
Join date : 2014-11-21
Age : 39
Location : Abbotsford BC
Re: rebuilding and upgrading my AOR, with pics
![]() matty89 Thu Jan 12, 2017 9:34 pm
matty89 Thu Jan 12, 2017 9:34 pm
matty89- Posts : 62
Join date : 2012-04-15
Re: rebuilding and upgrading my AOR, with pics
![]() sharkey Thu Jan 12, 2017 10:49 pm
sharkey Thu Jan 12, 2017 10:49 pm
if you dont understand my last paragraph, dont attempt it. ive seen many rear diffs people have worked on that didnt know how to do it, and it always ends up noisy and costing more money to fix. to remove the differential the front case half needs to be split from the rest of the transmission, so there is a fair bit of work involved. a shop should charge around 6hrs to install one for you. however it may be better to keep your eyes open for a good used lsd transaxle. the cost of an lsd diff ($500 for a used stock one up to $2500 for a real good one) and 6 hours labour to install (figure $600, plus some gaskets), a good used turbo lsd transaxle isnt terribly priced ($750-$1500 depending what one it is), plus in the end you have a spare non lsd, or you can sell that to get some money back.
sharkey- Posts : 714
Join date : 2014-11-21
Age : 39
Location : Abbotsford BC
Re: rebuilding and upgrading my AOR, with pics
![]() sharkey Thu Jan 12, 2017 11:21 pm
sharkey Thu Jan 12, 2017 11:21 pm


one thing i didnt think about till i already started machining was the dowel pin holes, as you can see, they are now gone. after some looking every picture ive found of the machined covers shows people arent machining them deeper. to me thats an issue, the rear cover needs to be properly indexed to the case to prevent loading the rear bearing to one side. so thats something i have to tackle yet, and i need to make some longer dowel pins.
im still pondering the cooler return oil thing, but after a little more looking im not going to leave it alone. on the cast iron case, at the bottom left of my above pics there is one drain hole, that gets partially blocked off by the stiffening plate and you end up with a very small channel. on the right side of the bearings, right under the shift rail holes is another drain hole, the plate blocks that, and for oil to flow into that the level would be as high as the bottom shift rail, and thats even a restricted path.
i keep running across this picture on google

its pretty obvious here they are trying to direct the oil onto the gears themselves, i dont think this is needed, in fact, i dont think there is any benefit at all in these transaxles, i cant say ive seen a picture of an over heated or oil starved gear. im thinking about maybe running a small -3 line into the rear housing and a larger -6 hose the main case somewhere. im still thinking about this, id like to find more info on the setup in that picture, would be some good food for thought
sharkey- Posts : 714
Join date : 2014-11-21
Age : 39
Location : Abbotsford BC
Re: rebuilding and upgrading my AOR, with pics
![]() sharkey Wed Jan 18, 2017 9:43 pm
sharkey Wed Jan 18, 2017 9:43 pm
ive also come to a decision on what im doing about the oil cooler return. im going to put a fitting on the top of the cast iron case and run a -6an hose to it, as well as run another -6an to the rear cover in the factory location. this should keep the rear section from filling up with oil. really doing this may be overkill and i may be able to just return all the oil to the rear cover, but i feel a lot better doing it this way.
sharkey- Posts : 714
Join date : 2014-11-21
Age : 39
Location : Abbotsford BC
Re: rebuilding and upgrading my AOR, with pics
![]() sharkey Fri Jan 20, 2017 7:38 pm
sharkey Fri Jan 20, 2017 7:38 pm
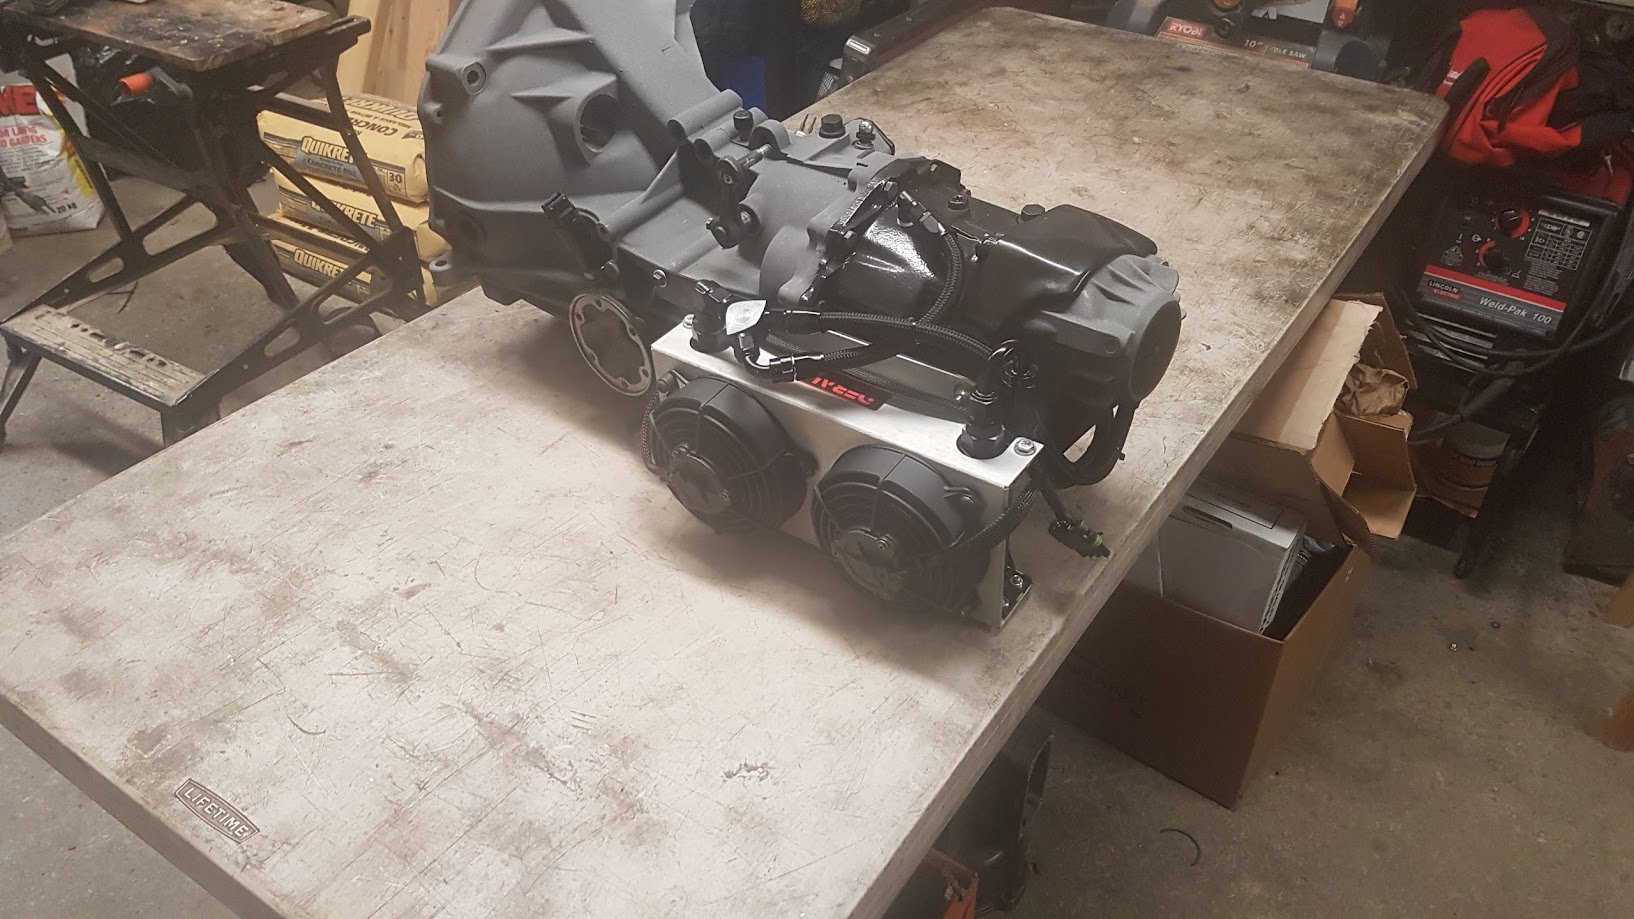
got few other things checked off on the list. i drilled and tapped the cooler return hole in the main case section.

i also made the fittings to go into the factory oil return and the pump. quite simple, i just used a couple off the shelf -8 and -6an fittings and machined them down. this is one of those times i really like having my benchtop lathe. best $350 i ever spent.


im going to run a fan temp switch to turn the oil cooler fans on and off. initially i thought our drain plug was just 3/4" npt but later found out it was metric. i decided to just drill and tap the factory drain plug for my fan switch, it actually worked out pretty well


last thing i machined up some longer dowel pins for the rear cover. from what i can see, most people seem to skip this when adding the stiffening plate and just run the cover unindexed. i dont like this idea, so i did it properly

so now that i have everything sorted out ill be sending the case out to sand blast and ill be powder coating it before i assemble it.
sharkey- Posts : 714
Join date : 2014-11-21
Age : 39
Location : Abbotsford BC
Re: rebuilding and upgrading my AOR, with pics
![]() racertomtom Sat Jan 21, 2017 9:23 am
racertomtom Sat Jan 21, 2017 9:23 am
I hadn’t considered the dowel length issue.
To clarify, did you put the cooler return in the housing in front of the stiffener plate and avoid restricting return oil through the plate?
racertomtom- Posts : 144
Join date : 2014-07-04
Age : 64
Location : Southern Illinois
Re: rebuilding and upgrading my AOR, with pics
![]() sharkey Sat Jan 21, 2017 2:35 pm
sharkey Sat Jan 21, 2017 2:35 pm
sharkey- Posts : 714
Join date : 2014-11-21
Age : 39
Location : Abbotsford BC
Re: rebuilding and upgrading my AOR, with pics
![]() racertomtom Sat Jan 21, 2017 7:54 pm
racertomtom Sat Jan 21, 2017 7:54 pm
racertomtom- Posts : 144
Join date : 2014-07-04
Age : 64
Location : Southern Illinois
Re: rebuilding and upgrading my AOR, with pics
![]() sharkey Sun Jan 22, 2017 9:57 pm
sharkey Sun Jan 22, 2017 9:57 pm

all i did with the lsd was inspec it and change the external splines plates from the 2.0mm to the 2.1mm thick plates to add some more preload. i reused the internal splines friction plates, they were still just as thick as new so i decided to save the $100. i also put in a new set of diff bearings just for good measure. the end result with the thicker external splines plates was the break free torque going from 32 lb/in stock to 125 lb/in.
now there was some discussion in another thread about how to id an aor lsd vs a regular lsd, so i grabbed some specs off of my aor diff for comparison.
thrust washer thickness- 1.77mm
cup spring thickness- 2.07mm
internal splines friction- 2.53mm
external splined plate- 1.97mm (original) 2.06 (new "2.1mm")
sharkey- Posts : 714
Join date : 2014-11-21
Age : 39
Location : Abbotsford BC
Re: rebuilding and upgrading my AOR, with pics
![]() sharkey Wed Feb 01, 2017 10:20 pm
sharkey Wed Feb 01, 2017 10:20 pm


now i can start putting the transmission back together
sharkey- Posts : 714
Join date : 2014-11-21
Age : 39
Location : Abbotsford BC
Re: rebuilding and upgrading my AOR, with pics
![]() sharkey Tue Feb 07, 2017 5:53 pm
sharkey Tue Feb 07, 2017 5:53 pm


now for the small detail. i discovered while assembling it that the gasket set didnt come with the o-rings or oil pump gasket. figured no big deal, ive got o-rings and the ill just silicone the pump cover. turns out the pump binds up without the gasket. i only found one place listing online (cogscogs.com) but after ordering it i got an email back saying its no longer available. there were 2 different options for it, a 0.20mm and 0.15mm, im hoping just the one i ordered is nla and the other isnt, but im not holding my breath. im going to have to track down some very thin gasket paper and try and cut my own.
sharkey- Posts : 714
Join date : 2014-11-21
Age : 39
Location : Abbotsford BC
Re: rebuilding and upgrading my AOR, with pics
![]() sharkey Sat Jun 03, 2017 5:59 pm
sharkey Sat Jun 03, 2017 5:59 pm


its in a less than ideal location with no direct air flow. looking at the factory cooler and a few options other people have done, it doesnt seem to be a big issue. the 2 fans pull a lot of air across the cooler so i think it will work alright. plumbing it will be a little interesting, however ive found some low enough profile fittings to get it done.
sharkey- Posts : 714
Join date : 2014-11-21
Age : 39
Location : Abbotsford BC
Re: rebuilding and upgrading my AOR, with pics
![]() daveslp Sun Jun 04, 2017 7:47 am
daveslp Sun Jun 04, 2017 7:47 am
daveslp- Posts : 5
Join date : 2017-05-07
Re: rebuilding and upgrading my AOR, with pics
![]() daveslp Sun Jun 04, 2017 7:48 am
daveslp Sun Jun 04, 2017 7:48 am
daveslp- Posts : 5
Join date : 2017-05-07
Re: rebuilding and upgrading my AOR, with pics
![]() sharkey Sun Jun 04, 2017 11:46 am
sharkey Sun Jun 04, 2017 11:46 am
sharkey- Posts : 714
Join date : 2014-11-21
Age : 39
Location : Abbotsford BC
Re: rebuilding and upgrading my AOR, with pics
![]() sharkey Mon Jun 05, 2017 1:05 am
sharkey Mon Jun 05, 2017 1:05 am
sharkey- Posts : 714
Join date : 2014-11-21
Age : 39
Location : Abbotsford BC
Re: rebuilding and upgrading my AOR, with pics
![]() Hotrodz of Dallas Tue Jun 06, 2017 2:10 pm
Hotrodz of Dallas Tue Jun 06, 2017 2:10 pm
[/quote]
[/quote]
Just curious how you're getting power for the fans through the stub axle.
Hotrodz of Dallas- Posts : 615
Join date : 2015-10-31
Age : 65
Location : Dallas-Ft. Worth
Re: rebuilding and upgrading my AOR, with pics
![]() sharkey Tue Jun 06, 2017 3:48 pm
sharkey Tue Jun 06, 2017 3:48 pm
sharkey- Posts : 714
Join date : 2014-11-21
Age : 39
Location : Abbotsford BC
Re: rebuilding and upgrading my AOR, with pics
![]() sharkey Thu Jul 06, 2017 12:00 am
sharkey Thu Jul 06, 2017 12:00 am

sharkey- Posts : 714
Join date : 2014-11-21
Age : 39
Location : Abbotsford BC
944Hybrids: 924/944/968 and 928 V8 Conversions :: Technical Stuff (other than motors) :: Transmission and Clutch Tech
» Best engine uprights/plates
» LEAKING TPC HYDROBOOST
» HYDRAULIC THROWOUT/RELEASE BEARING NOT ENGAGING FULLY
» Fesler Saratoga Top
» Ray's 1987 944 LS1 Build & Swap
» LS 982 5speed project here
» LT1 Spark Plug make and model
» 928 5-speed kit
» Slave Cylinder Spacing from Clutch Fingers